Introduction
The sakiademo installation is used to replicate the demonstration site located as www.sakilademo.com. It is a good idea to install this demo locally if you are planning to build your own sites that interact with a database. Installing the sakilademo site is similar to what you did when you installed the GenHelm IDE. Here are the steps required to install sakilademo:
Step |
Remote Server |
Local PC or Mac |
|---|---|---|
| Create sakilademo Subdomain | ✓ | ❌ |
| Download and unzip the sakilademo files | ✓ | ✓ |
| Transfer or copy the files to your web server | ✓ | ✓ |
| Install the sakilademo database | ✓ | ✓ |
| Stow site_settings within sakilademo | ✓ | ✓ |
| Configure your database connection | ✓ | ✓ |
| Test the sakilademo application | ✓ | ✓ |
Let's review these steps in detail.
Define the sakilademo Subdomain
If you are installing on a remote server you should define a new subdomain on your sandbox named salikademo. This is not necessary if you are installing the demo on a stand-alone PC or Macintosh computer.
Download and Unzip the sakilademo Folders
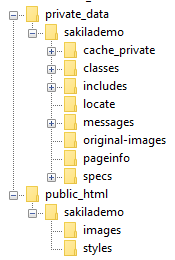
If you have not already done so you will need to download and unzip the sakilademo folders. Here we see the folders that are part of the sakilademo installation:
Copy the Files to your Web Server
You will need to copy the sakilademo folder located under private_data to the private_data folder on your webserver.
You must also copy the sakilademo folder located under public_html to your web server's document root folder.
When you are finished, assuming you installed sakilademo in your sandbox environment, your web server should contain the following folders:
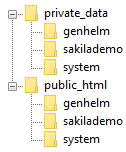
Depending on how you installed the GenHelm Application Runtime, the public_html folder might be named htdocs or some other name.
At this point the sakilademo is installed and you should be able to access the home page on your webserver by navigating to the url sakilademo.[your-sandbox-domain].com or if you installed it locally the url would be localhost/sakilademo.
You won't be able to test most of the pages because they interact with a database. Let's create the database next.
Create the Sakila Demo Database
Follow this link to the MySQL site to learn how to Install the Sakila Database. You should see this page which allows you to download the database as a zip file.

Follow the PDF Setup Guide which describes how to install the sakila database.
Invoke GenHelm to Update the sakilademo Site
After invoking GenHelm, use the command logon sakilademo to maintain the sakilademo website.
Stow site_settings
Use the command e site_settings to load the site settings. Enter the stow command to update the encryption passwords associated with this site.
Configure the Database
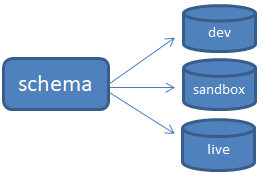
The GenHelm framework allows you define up to three different config files for each schema as shown here.
In GenHelm, you can use the command e sakila to see the main sakila definition. Since there are two components named sakila you will see a popup like this one where you can click on the schema definition.

You will be shown this definition:
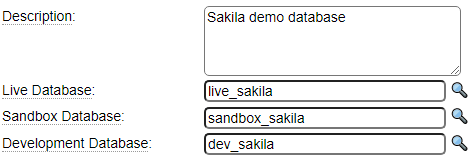
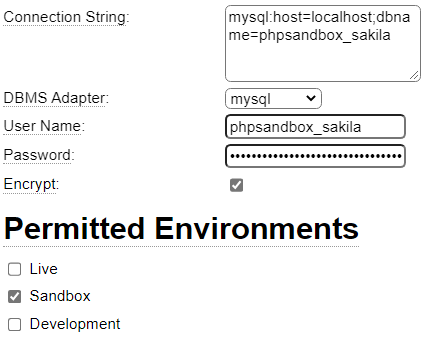
If you installed the sakila database in your sandbox environment you will need to configure sandbox_sakila. If you installed the database on a local PC (and you set your environment value inside private_data/system/config/_environment_localhost.inc to 2) will configure dev_sakila.
Here is an example of what sandbox_sakila might look like after you have updated it to correspond to your database host name and user.
Testing Your Site
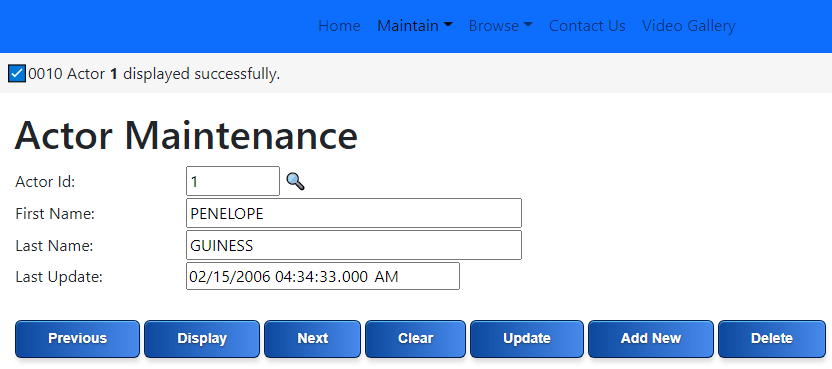
At this point you should be able to access the maintenance and browse pages of your site. Here we select the Actor Maintenance page and click the Next button to validate that we have a valid database connection.
Exploring the sakilademo Components
An easy way to explore all of the components that make up any website is to click on the link next to the Website label as shown in the screen below.

This will bring up a page like the one below. If you click the Flatten Folders option you will see all of the components that make up the site.
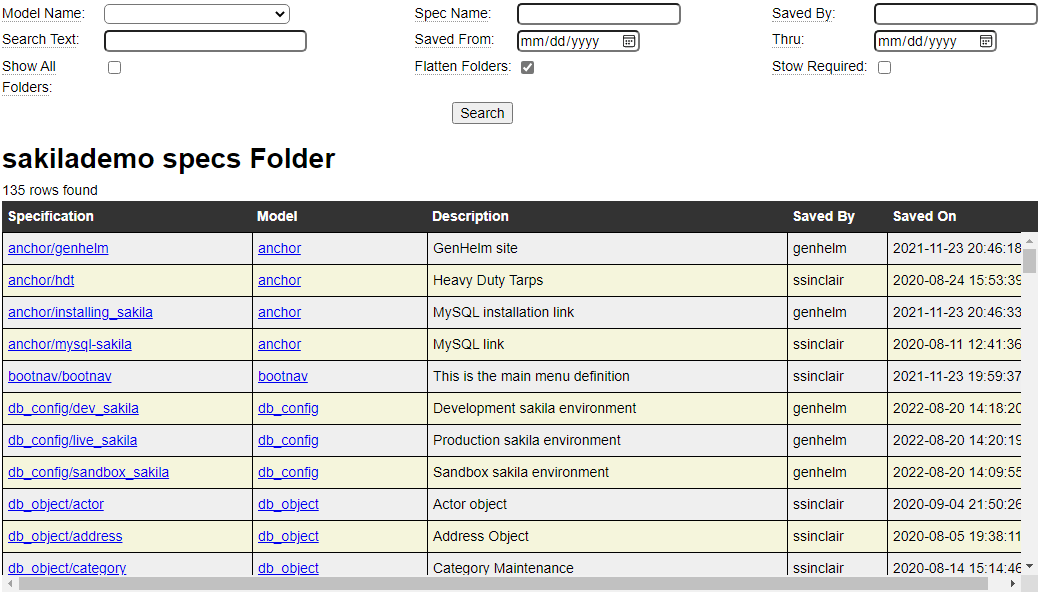
From there you can click on the various components to see their specification. As you look at each of the page specifications, bring up the website in the browser to see the correlation between the pages and their specifications.