Introduction
This page describes how to install the GenHelm Integrated Development Environment for the first time. Before installing the GenHelm IDE you must first install the GenHelm Application Runtime. If you have not done so, please visit Installing the GenHelm Application Runtime.
To install the GenHelm IDE you will be completing the following steps:
Step |
Remote Server |
Local PC or Mac |
|---|---|---|
| Create genhelm Subdomain | ✓ | ❌ |
| Download and unzip the genhelm files | ✓ | ✓ |
| Transfer or copy the files to your web server | ✓ | ✓ |
| Generate a temporary password | ✓ | ✓ |
| Save an initial password file under your desired id | ✓ | ✓ |
| Log into GenHelm | ✓ | ✓ |
| Stow site_settings within system and genhelm | ✓ | ✓ |
| Define yourself as a user in genhelm | ✓ | ✓ |
| Synchronize the save dates on the installation files | ✓ | ✓ |
Let's review these steps in detail.
Define the genhelm Subdomain
If you are installing on a remote server you should define a new subdomain on your sandbox named genhelm. This is not necessary if you are installing GehHelm on a stand-alone PC or Macintosh computer.
Download and Unzip the genhelm Folders
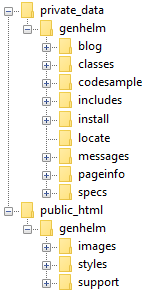
If you have not already done so you will need to download and unzip the genhelm folders. Here we see the folders that are part of the GenHelm IDE installation:
Copy the Files to your Web Server
You will need to copy the genhelm folder located under private_data to the private_data folder on your webserver.
You must also copy the genhelm folder located under public_html to your web server's document root folder.
When you are finished, your web server should contain the following folders:
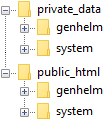
Depending on how you installed the GenHelm Application Runtime, the public_html folder might be named htdocs or some other name.
At this point the GenHelm IDE is installed but you won't be able to access it until you define yourself as a user.
Generate a Temporary Password
If you have installed the GenHelm runtime on remote server, try loading the url:
http://genhelm.[your-sandbox-domain]/genhash
If you installed on a local PC or Mac try loading:
http://localhost/genhelm/genhash
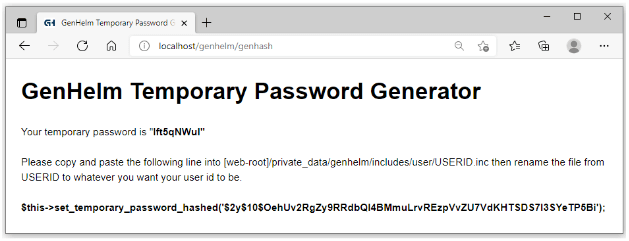
You should see a screen that looks like this:
If you don’t see this screen try an alternate version of the url that includes the page name as part of the query string. In this case the server based URL will look like this:
http://genhelm.[your-sandbox-domain]/index.php?page=genhash
If you installed on a local PC or Mac use this URL:
http://localhost/genhelm/index.php?page=genhash
If this second form of the URL works (but the first did not) it likely means that one of the following needs to be corrected:
- Your default document is not set to index.php
- Your ErrorDocument is not correctly pointing to index.php
- The version of index.php in the document root folder does not agree with what is in the public_html folder on the installation zip.
If neither one of these URLs load, you will need to debug the problem before continuing with the installation.
We don’t provide a default user id and password as part of the installation so as not to tempt hackers to try to use this default id.
Since GenHelm requires a login to access the system you must manually create a login for yourself as the first user. Then you will be able to define other users using GenHelm itself.
Decide on Your User Id
Next you will decide what user id you intend to use with GenHelm. Often this will be a combination of letters from your first and last name or you could also use your email address. User ids cannot contain spaces and must begin with a lower case character followed by any combination of lower case characters, numbers or the characters “.”, “-”, “_” and “@”.
Locate the Template File in the Extracted Zip
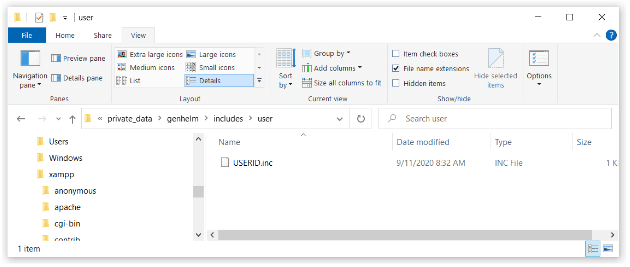
Locate the extracted file named private_data/genhelm/includes/user/USERID.inc
Here we show this file as part of a local installation:
Rename the Template File
Rename this file to correspond with the user id that you want to use in GenHelm, making sure that you keep the “.inc” extension.
Edit the Renamed File
Open the file in Notepad or any other editor to change the file contents.
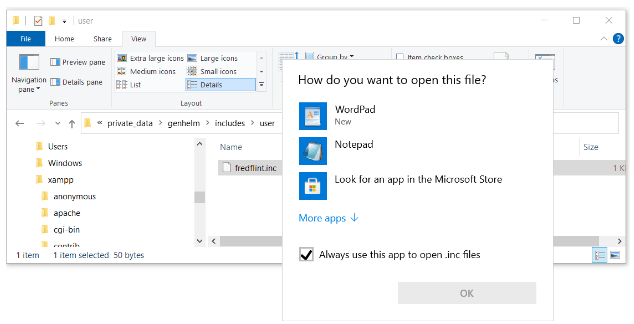
This file initially contains the following:
<?php
// Paste line generated by page genhash
?>
Update your user file with the temporary password.
Replace the second row of the userid.inc file with the contents from the genhash page that you loaded in your browser.
Notice the page contains two important things:
- A temporary password that you will enter into the password screen
- A line of code that you will copy into a .inc file that you just renamed
Copy the last line on the page to the clipboard and paste this into the .inc file that you are editing. When you are finished the file will look something like this:
<?php
$this->set_temporary_password_hashed('$2y$10$RlsLd7.NP81ozu2cQqe0521ELXf.mDV.6lmhzSP0tH6nfxa');
?>
and will be named something like yourname.inc where yourname is the id that you want to use to access GenHelm. Be sure to save your changes to the file.
Copy the Temporary Password to the Clipboard
Next copy the temporary password shown on the genhash web page (this is on row two between the double quotes). Be sure not to refresh the page since this would generate a new password and hash value.
FTP the User File to the Sandbox Server
If you installed GenHelm on a server, you will need to transfer the renamed user file to the private_data/genhelm/includes/user folder within your sandbox environment. If you are an administrator for this server or if you are installing GenHelm on a PC or Mac you should consider copying this user file to the system site, rather than the genhelm site. In such a case you will copy this file to the folder private_data/system/includes/user instead. By defining your user id within system you will be granted logon access to all (developed) sites on the sandbox server, not just genhelm.
You should now be able to log on to GenHelm
Logging Into GenHelm
You should now be able to login to GenHelm using the user id that corresponds to the file name you chose and the temporary password shown on the genhash page.
If you installed GenHelm on a remote sandbox you will use the url:
http://genhelm.[your-sandbox-domain]/
If you installed on a local machine the url will be:
http://localhost/genhelm
The URLs should lead to a login page.
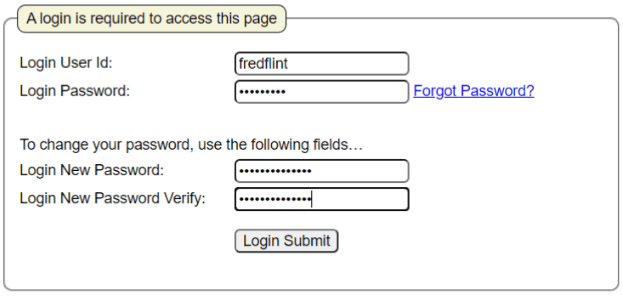
Enter your user id and temporary password into the first two fields. You will also need to enter a new password in the third field and repeat this in the fourth field. Your new password must include both letters and numbers and must be at least eight characters in length.
After logging in you should see the following screen:

You interact with GenHelm by entering commands into the Command field and clicking on the right arrow or pressing the Enter key.
Make note of the question mark icon on the main screen. Later you can click on the![]() to begin learning about GenHelm.
to begin learning about GenHelm.
Securing GenHelm
One of the ways GenHelm secures your sites is by associating secret keys with each subdomain. These keys will be randomly generated when you stow your site settings for the first time. Let’s go through this process next for the genhelm and system domains.
The following screen samples reflect the localhost domain however the same procedure will be followed when using a remote sandbox.
Logon to genhelm

Edit site_settings

Stow
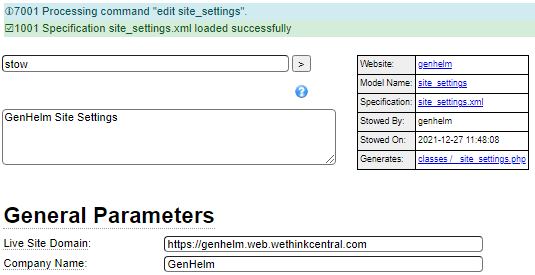
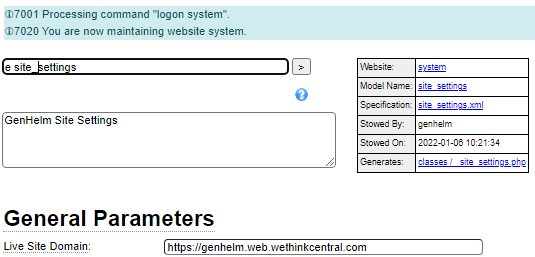
Logon system
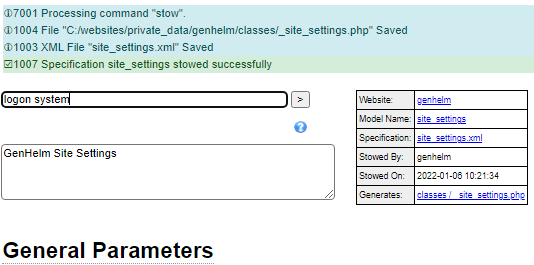
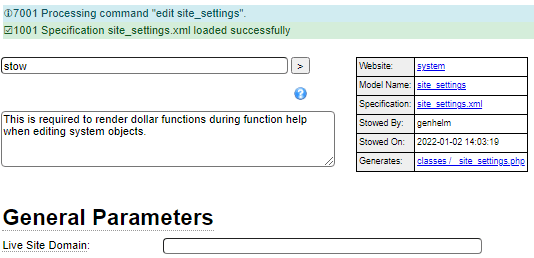
Edit site_settings
Stow
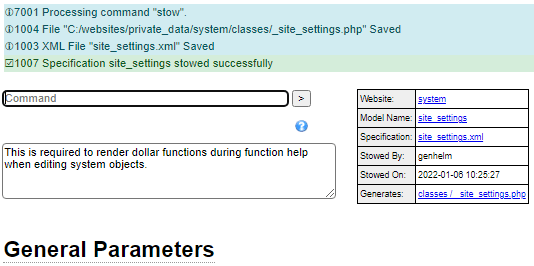
Stow Confirmed
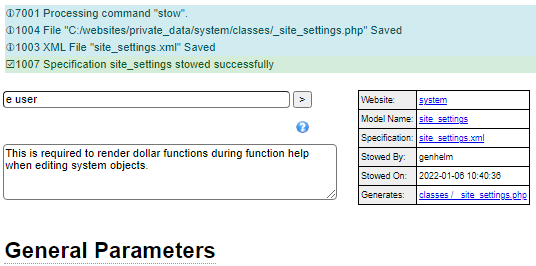
Defining Yourself in GenHelm
In order to create new websites in GenHelm you will need to define yourself with the proper privileges. If you copied your temporary user definition into the system folder you should define yourself as a user within system. If you copied your temporary user definition in genhelm you should logon to genhelm before defining your user profile.
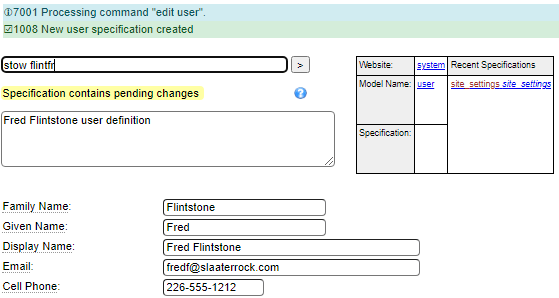
When you are within the correct site invoke the user model using the command “e user”:
Fill in the screen with all of your user details. Be sure to include your email address and phone number since these are used to reset your password if you forget it.
Scroll down to the Group/Role definition and define a row for group site-admin with role site-creator. This will allow you to define new sites within GenHelm. If you are involved in promoting sites to production, you should also define yourself to the promoter role within the live environment. Since you are installing GenHelm, you should also add yourself to the installer role. All three of these roles should be within the site-admin group.

When you are finished entering the information stow the definition under the name that corresponds to your user id:
To learn more about using GenHelm follow this link ![]() near the command line.
near the command line.
Installing the Sakila Demo Site
If you are planning to build database applications using GenHelm you should consider installing the Sakila Demo site locally so that you can refer to the settings used to build the site at https://www.sakilademo.com. Follow this link to learn about installing this sakilademo site.
Synchronizing the Save Time on Installed Components
One of the features of GenHelm is that it can detect when generated components have been modified by hand. This is done by comparing the save dates of the generated components with that of the specification used to generate the components. Depending on how you installed GenHelm, these save dates may have been overwritten by the operating system. Therefore, we recommend running a synchronize utility to restore the save dates back to the time when the components were last generated. To use this utility, follow these steps.
- Copy the installation zip files to your GenHelm server environment
- Launch the install/syncsavetime wizard from your browser
- Synchronize the save times for the system runtime
- Synchronize the save times for the genhelm site
- Optionally synchronize the save times for the sakilademo site
These steps are described in detail below.
Copy or Upload the Installation Zip Files
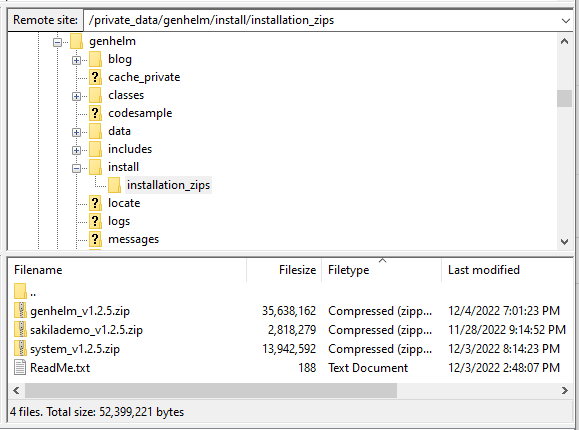
One of the folders that you created when you installed GenHelm is named private_data/genhelm/install/installation_zips. In this step, you will be copying the three installation files into this folder. These zip files are used by the date synchronizing process. It is a good idea to keep these files even after you have finished this process so that you have a backup of all installed files in case you accidentally delete or change one of this installation files. After copying the zip files to the installation_zips folder your genhelm folder will look like this:
Launch the install/syncsavetime Utility
The sync utility can only be launched by users of the group site-admin who are assigned the role installer. If you just updated your user id with this role you will need to log in again in order for the role designation to take effect.
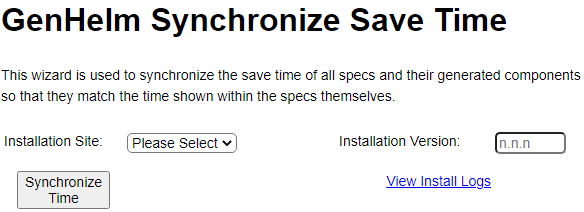
To launch this utility, change your normal GenHelm url to page install/syncsavetime in your sandbox environment. This will present the following page.
Synchronize system Save Times
Select system in the drop-down control and enter the version number you just installed in the Installation Version, then click the Synchronize Time button.
This may execute for several minutes then, when it is completed, you will see a summary form at the bottom of the screen such as the following:
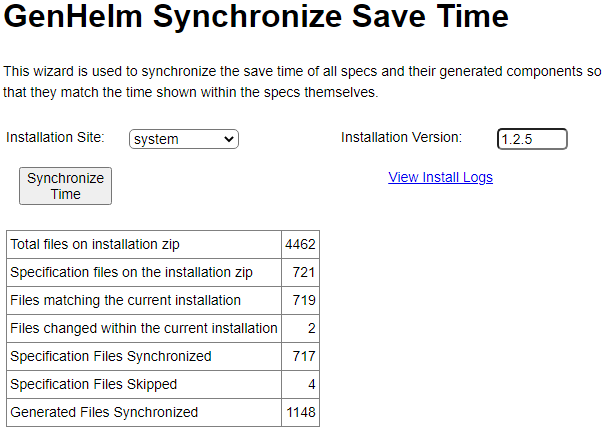
You can use the View Install Logs link to see the details of any files that were not synchronized.
Synchronize genhelm Save Times
Repeat the process above except select genhelm in the drop-down field.
Synchronize sakilademo Save Times
If you installed the sakilademo site, repeat this process for that site as well.