Before you can create your first production site it is necessary to perform a few preliminary steps within the live site environment.
The steps described in this section only need to be done once, regardless of how many sites are defined on your production server. If you are already hosting one or more sites based on the GenHelm framework, and the existing sites use the same sandbox as the site you wish to promote, you can skip this section.
Establish Master Account and Domain
If you are using cPanel, the easiest way to deploy your websites is to do so using one master account which has one add-on domain for each of the different sites you want to host. This will make it easy to share a single instance of the GenHelm runtime framework across all of your sites. You will need one extra domain (in addition to your site domains) to allow access to framework components. This extra domain can be named whatever you wish but typically this should be associated with your company and you will generally want to keep this as short as possible. In our example, we use wtscdn.com as the framework domain.
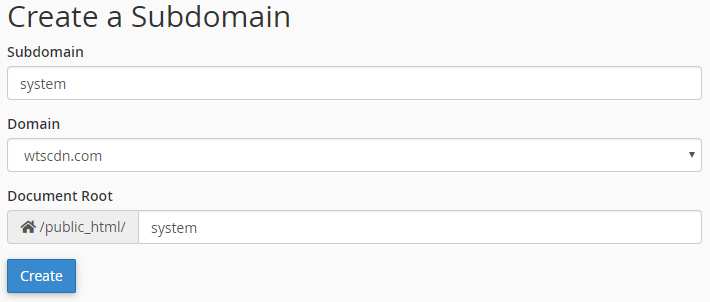
Define Subdomain Named system
All websites need to access components that reside in the system subdomain. Create this subdomain using cPanel or whatever server management tool you use.

If your server does not default to using PHP 7.2 or higher, you will need to change the settings for the subdomain so that it uses a recent PHP version. Under cPanel this can be done using MultiPHP Manager.
Copying the GenHelm Runtime Framework
Since this is the very first site you are publishing it is necessary to copy the components that reside under the public_html/system folder and the private_data/system folder. Additionally, you will need to copy the webstart.php module into your web server's root folder. When you are finished, your production web server will contain the following folders:

The document root for each of your sites will be one of the subfolders within the public_html directory.
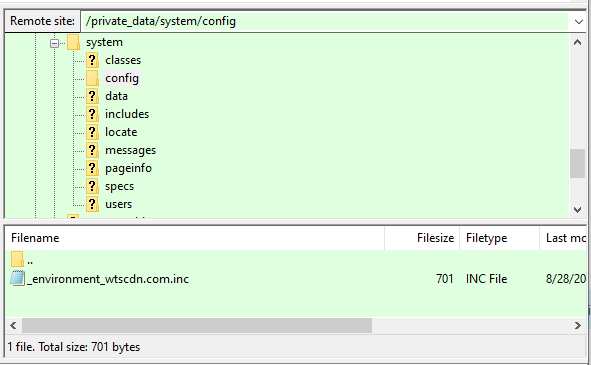
Since this is your first site, you will also need to create a .ini file within the private_data/system/config folder to configure your server. This file must be named according to your master account domain using the convention _environment_[masterdomain].ini as we see here:

Here is an example of the contents of this file:
<?php
$this->set_environment(0); // Production
$this->set_noindex_domain('wtscdn.com');
$this->set_framework_domain('https://system.wtscdn.com');
$this->set_server_password('k1dyx(*m3kd(23}[jksxSL1xsNdjw39OldXd');
$this->set_server_timezone('America/Toronto'); // Eastern Standard
$this->set_sandbox('devbox1');
$this->set_config('mail','return_path','mail@wtscdn.com');
$this->set_config('mail','sender_verify','sender-verify@wtscdn.com');
$this->set_config('mail','mail_archive','all-mail@wtscdn.com');
$this->set_config('mail','mailform_sender','mailform@wtscdn.com');
$this->set_config('google','adsense_id','pub-6922122315420456');
$this->set_config('google','map_api_key','AIzaSyeFSnxpccAf263ifSRA2ywx3aTXuD609fI');
?>
Let's review these configuration settings:
environment
This must always be passed 0 in the production environment.
noindex_domain
This is used to prevent certain domains from being indexed by Google and other search engines. This statement can be repeated for each site that you do not want to be indexed. In most cases, this is used to prevent indexing of the master domain. Since the master domain hosts many sites as add-on domains these add-on domains can theoretically be accessed as subdomains of the master domain. When this happens we want to no-index the pages to prevent duplicate content from being indexed.
framework_domain
This tells the GenHelm runtime which domain to use to reference shared images, css and script. This generally points to the system subdomain.
server_timezone
This setting is optional. If the timezone is not set, this will default to the timezone set within your php.ini config file.
server_password
The server password is used for encryption and authentication. Each server should have a unique secret server password that is at least 25 characters long.
sandbox
The sandbox setting is used to tell the production server how to communicate with its supporting sandbox site. For more information about how to configure your sandbox to automate the promotion process please follow this link: Connecting a Production Server to its Sandbox.
Configuration Settings
The remaining settings are configurations that apply to various components of the GenHelm runtime. These may not be required if you are not using certain GenHelm features.
Email Settings
In most cases you will need to set the email parameters. These are used if you are sending out emails from your server via components generated using the mailform model.
$this->set_config('mail','return_path','value');
Use this setting to set the return email address to be used when emails fail to be delivered. Generally this address will coincide with your master domain.
$this->set_config('mail','mail_archive','value');
If you want to save a blind copy of every email sent from your server, across all hosted sites, enter the email address to be BCCed here.
$this->set_config('mail','mailform_sender','value');
Since all email is sent via the master domain, you must establish an email address on this domain to be designated as the sending address. Without this, most of your emails will be flagged as spam by the receiving mail server. Note that the email sender is not the same as the return address. Even though your sender email is an address belonging to your master domain, when user’s reply to email sent by your server the reply will be sent to a return address associated with the website that caused the email to be sent. This is determined by the settings used in the mailform model.
Google Adsense Id
This is used by the dollar adsense function to define the default ad publisher account.
Google Map Key
This is used by the googlemap model to set the google map API key to be used when rendering generated maps.
Follow this link to return to the help that describes publishing a particular site for the first time.

